
If you need urgent consulting help click here
Setting up a new project
After installing the SDK or starting the docker image, you should have a workspace directory structure that looks like this:
.
├── .west
├── app <- your application
├── bootloader
├── modules
├── sdk
├── tools
└── zephyr
Here you have the SDK, modules and Zephyr kernel source code.
You project should be created inside this workspace directory. This is important, because the west tool used for building takes its configuration from the .west directory in this tree (it looks in parent directory for this config).
Your application can be a separate git repository, but you should check out this repository into this workspace. It is possible to do this automatically using a standalone west.yml manifest that contains all of your projects, but we can do this later since we already have a west.yml file inside the sdk that we use instead.
Create directory in your workspace and go to it (you can do this inside the docker image):
cd /build/platform && mkdir app && cd app
Create your main.c file:
mkdir src
cat > src/main.c
#include <kernel.h>
void main(void){
        printk("Hello world!\n");
}
(you can use ‘cat’ command like this and press C-d when you are done to exit)
Create a project configuration file:
cat > prj.conf
CONFIG_SHELL=y
Here we will include shell into our app so that we can connect to it over a uart and run basic shell commands. The shell module is provided by Zephyr and this way of enabling shell functionality shows just how modular and flexible the process of working with this SDK is in practice.
Next we create a CMakeLists.txt file that will be used to build our project:
cat > CMakeLists.txt
cmake_minimum_required(VERSION 3.13.1)

find_package(Zephyr REQUIRED HINTS $ENV{ZEPHYR_BASE})
project(app)

target_sources(app PRIVATE src/main.c)
This is all you need to start building your application. We can now build this project for any one of the 400+ boards. You can see all available boards like this:
west boards
For this example, we are going to build the project for the custom board provided in the SDK since it defines testbench functionality and simulation.
west build -p -b custom_board .
We can now run the application in the default simulation provided by the board.
west build -t boardbench
This will load and run the new STM32 binary on the basic simulation setup provided by the custom board definition (under boards/arm/custom_board/custom_board.resc):
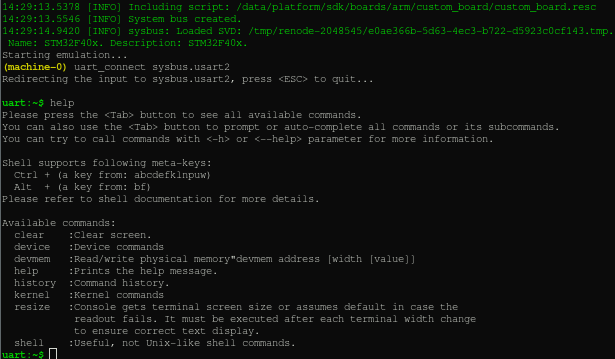
You can now start a GDB server inside the simulation and connect to it if you want:
(machine-0) machine StartGdbServer 3333
# ... in another termina start gdb:
(gdb) target remote :3333
This gives you full debugging capabilitites inside the simulation. The simulator acts as “debug monitor” (just like your JTAG adapter) and is accessible from GDB using the “mon” command (try “mon help” and it will be the same output as you get when you type “help” in the simulator prompt.
This means that you have full access to all simulation parameters, buttons and peripheral functions from inside GDB (including peripherals that are “connected to the board” - outside of the CPU).