
If you need urgent consulting help click here
Getting Started Guide
Follow this guide to:
Set up a command-line Zephyr development environment on Ubuntu, macOS, or Windows (instructions for other Linux distributions are discussed in Install Linux Host Dependencies)
Get the source code
Build, flash, and run a sample application
Select and Update OS
Click the operating system you are using.
This guide covers Ubuntu version 18.04 LTS and later.
sudo apt update
sudo apt upgrade
On macOS Mojave or later, select System Preferences > Software Update. Click Update Now if necessary.
On other versions, see this Apple support topic.
Select Start > Settings > Update & Security > Windows Update. Click Check for updates and install any that are available.
Install dependencies
Next, you’ll install some host dependencies using your package manager.
The current minimum required version for the main dependencies are:
Tool |
Min. Version |
|---|---|
3.20.0 |
|
3.6 |
|
1.4.6 |
Download, inspect and execute the Kitware archive script to add the Kitware APT repository to your sources list. A detailed explanation of
kitware-archive.shcan be found here kitware third-party apt repository:wget https://apt.kitware.com/kitware-archive.sh sudo bash kitware-archive.sh
Use
aptto install the required dependencies:sudo apt install --no-install-recommends git cmake ninja-build gperf \ ccache dfu-util device-tree-compiler wget \ python3-dev python3-pip python3-setuptools python3-tk python3-wheel xz-utils file \ make gcc gcc-multilib g++-multilib libsdl2-dev
Verify the versions of the main dependencies installed on your system by entering:
cmake --version
python3 --version
dtc --version
Check those against the versions in the table in the beginning of this section. Refer to the Install Linux Host Dependencies page for additional information on updating the dependencies manually.
Install Homebrew:
/bin/bash -c "$(curl -fsSL https://raw.githubusercontent.com/Homebrew/install/HEAD/install.sh)"
Use
brewto install the required dependencies:brew install cmake ninja gperf python3 ccache qemu dtc wget
Note
Due to issues finding executables, the Zephyr Project doesn’t currently support application flashing using the Windows Subsystem for Linux (WSL) (WSL).
Therefore, we don’t recommend using WSL when getting started.
These instructions must be run in a cmd.exe command prompt. The
required commands differ on PowerShell.
These instructions rely on Chocolatey. If Chocolatey isn’t an option,
you can install dependencies from their respective websites and ensure
the command line tools are on your PATH environment
variable.
Open a
cmd.exewindow as Administrator. To do so, press the Windows key, type “cmd.exe”, right-click the result, and choose Run as Administrator.Disable global confirmation to avoid having to confirm the installation of individual programs:
choco feature enable -n allowGlobalConfirmationUse
chocoto install the required dependencies:choco install cmake --installargs 'ADD_CMAKE_TO_PATH=System' choco install ninja gperf python git dtc-msys2 wget unzip
Close the window and open a new
cmd.exewindow as a regular user to continue.
Get Zephyr and install Python dependencies
Next, clone Zephyr and its modules into a new west workspace named zephyrproject. You’ll also install Zephyr’s
additional Python dependencies.
Python is used by the west meta-tool as well as by many scripts invoked by
the build system. It is easy to run into package incompatibilities when
installing dependencies at a system or user level. This situation can happen,
for example, if working on multiple Zephyr versions at the same time. For this
reason it is suggested to use Python virtual environments.
Install west, and make sure
~/.local/binis on yourPATHenvironment variable:pip3 install --user -U west echo 'export PATH=~/.local/bin:"$PATH"' >> ~/.bashrc source ~/.bashrc
Get the Zephyr source code:
west init ~/zephyrproject
cd ~/zephyrproject
west update
Export a Zephyr CMake package. This allows CMake to automatically load boilerplate code required for building Zephyr applications.
west zephyr-exportZephyr’s
scripts/requirements.txtfile declares additional Python dependencies. Install them withpip3.pip3 install --user -r ~/zephyrproject/zephyr/scripts/requirements.txt
Create a new virtual environment:
python3 -m venv ~/zephyrproject/.venv
Activate the virtual environment:
source ~/zephyrproject/.venv/bin/activateOnce activated your shell will be prefixed with
(.venv). The virtual environment can be deactivated at any time by runningdeactivate.Note
Remember to activate the virtual environment every time you start working.
Install west:
pip install west
Get the Zephyr source code:
west init ~/zephyrproject
cd ~/zephyrproject
west update
Export a Zephyr CMake package. This allows CMake to automatically load boilerplate code required for building Zephyr applications.
west zephyr-exportZephyr’s
scripts/requirements.txtfile declares additional Python dependencies. Install them withpip.pip install -r ~/zephyrproject/zephyr/scripts/requirements.txt
Install west:
pip3 install -U west
Get the Zephyr source code:
west init ~/zephyrproject
cd ~/zephyrproject
west update
Export a Zephyr CMake package. This allows CMake to automatically load boilerplate code required for building Zephyr applications.
west zephyr-exportZephyr’s
scripts/requirements.txtfile declares additional Python dependencies. Install them withpip3.pip3 install -r ~/zephyrproject/zephyr/scripts/requirements.txt
Create a new virtual environment:
python3 -m venv ~/zephyrproject/.venv
Activate the virtual environment:
source ~/zephyrproject/.venv/bin/activateOnce activated your shell will be prefixed with
(.venv). The virtual environment can be deactivated at any time by runningdeactivate.Note
Remember to activate the virtual environment every time you start working.
Install west:
pip install west
Get the Zephyr source code:
west init ~/zephyrproject
cd ~/zephyrproject
west update
Export a Zephyr CMake package. This allows CMake to automatically load boilerplate code required for building Zephyr applications.
west zephyr-exportZephyr’s
scripts/requirements.txtfile declares additional Python dependencies. Install them withpip.pip install -r ~/zephyrproject/zephyr/scripts/requirements.txt
Install west:
pip3 install -U west
Get the Zephyr source code:
cd %HOMEPATH%
west init zephyrproject
cd zephyrproject
west update
Export a Zephyr CMake package. This allows CMake to automatically load boilerplate code required for building Zephyr applications.
west zephyr-export
Zephyr’s
scripts\requirements.txtfile declares additional Python dependencies. Install them withpip3.pip3 install -r %HOMEPATH%\zephyrproject\zephyr\scripts\requirements.txt
Create a new virtual environment:
cd %HOMEPATH%
python3 -m venv zephyrproject\.venv
Activate the virtual environment:
:: cmd.exe
zephyrproject\.venv\Scripts\activate.bat
:: PowerShell
zephyrproject\.venv\Scripts\Activate.ps1
Once activated your shell will be prefixed with
(.venv). The virtual environment can be deactivated at any time by runningdeactivate.Note
Remember to activate the virtual environment every time you start working.
Install west:
pip install west
Get the Zephyr source code:
west init zephyrproject
cd zephyrproject
west update
Export a Zephyr CMake package. This allows CMake to automatically load boilerplate code required for building Zephyr applications.
west zephyr-exportZephyr’s
scripts\requirements.txtfile declares additional Python dependencies. Install them withpip.pip install -r %HOMEPATH%\zephyrproject\zephyr\scripts\requirements.txt
Install Zephyr SDK
The Zephyr Software Development Kit (SDK) contains toolchains for each of Zephyr’s supported architectures, which include a compiler, assembler, linker and other programs required to build Zephyr applications.
It also contains additional host tools, such as custom QEMU and OpenOCD builds that are used to emulate, flash and debug Zephyr applications.
Download and verify the latest Zephyr SDK bundle:
cd ~
wget https://github.com/zephyrproject-rtos/sdk-ng/releases/download/v0.14.2/zephyr-sdk-0.14.2_linux-x86_64.tar.gz
wget -O - https://github.com/zephyrproject-rtos/sdk-ng/releases/download/v0.14.2/sha256.sum | shasum --check --ignore-missing
If your host architecture is 64-bit ARM (for example, Raspberry Pi), replace
x86_64withaarch64in order to download the 64-bit ARM Linux SDK.Extract the Zephyr SDK bundle archive:
tar xvf zephyr-sdk-0.14.2_linux-x86_64.tar.gz
Note
It is recommended to extract the Zephyr SDK bundle at one of the following locations:
$HOME$HOME/.local$HOME/.local/opt$HOME/bin/opt/usr/local
The Zephyr SDK bundle archive contains the
zephyr-sdk-0.14.2directory and, when extracted under$HOME, the resulting installation path will be$HOME/zephyr-sdk-0.14.2.Run the Zephyr SDK bundle setup script:
cd zephyr-sdk-0.14.2
./setup.sh
Note
You only need to run the setup script once after extracting the Zephyr SDK bundle.
You must rerun the setup script if you relocate the Zephyr SDK bundle directory after the initial setup.
Install udev rules, which allow you to flash most Zephyr boards as a regular user:
sudo cp ~/zephyr-sdk-0.14.2/sysroots/x86_64-pokysdk-linux/usr/share/openocd/contrib/60-openocd.rules /etc/udev/rules.d
sudo udevadm control --reload
Download and verify the latest Zephyr SDK bundle:
cd ~
wget https://github.com/zephyrproject-rtos/sdk-ng/releases/download/v0.14.2/zephyr-sdk-0.14.2_macos-x86_64.tar.gz
wget -O - https://github.com/zephyrproject-rtos/sdk-ng/releases/download/v0.14.2/sha256.sum | shasum --check --ignore-missing
If your host architecture is 64-bit ARM (Apple Silicon, also known as M1), replace
x86_64withaarch64in order to download the 64-bit ARM macOS SDK.Extract the Zephyr SDK bundle archive:
tar xvf zephyr-sdk-0.14.2_macos-x86_64.tar.gz
Note
It is recommended to extract the Zephyr SDK bundle at one of the following locations:
$HOME$HOME/.local$HOME/.local/opt$HOME/bin/opt/usr/local
The Zephyr SDK bundle archive contains the
zephyr-sdk-0.14.2directory and, when extracted under$HOME, the resulting installation path will be$HOME/zephyr-sdk-0.14.2.Run the Zephyr SDK bundle setup script:
cd zephyr-sdk-0.14.2
./setup.sh
Note
You only need to run the setup script once after extracting the Zephyr SDK bundle.
You must rerun the setup script if you relocate the Zephyr SDK bundle directory after the initial setup.
Open a
cmd.exewindow by pressing the Windows key typing “cmd.exe”.Download the latest Zephyr SDK bundle:
cd %HOMEPATH%
wget https://github.com/zephyrproject-rtos/sdk-ng/releases/download/v0.14.2/zephyr-sdk-0.14.2_windows-x86_64.zip
Extract the Zephyr SDK bundle archive:
unzip zephyr-sdk-0.14.2_windows-x86_64.zipNote
It is recommended to extract the Zephyr SDK bundle at one of the following locations:
%HOMEPATH%%PROGRAMFILES%
The Zephyr SDK bundle archive contains the
zephyr-sdk-0.14.2directory and, when extracted under%HOMEPATH%, the resulting installation path will be%HOMEPATH%\zephyr-sdk-0.14.2.Run the Zephyr SDK bundle setup script:
cd zephyr-sdk-0.14.2
setup.cmd
Note
You only need to run the setup script once after extracting the Zephyr SDK bundle.
You must rerun the setup script if you relocate the Zephyr SDK bundle directory after the initial setup.
Build the Blinky Sample
Note
Blinky is compatible with most, but not all, Supported Boards. If your board does not meet Blinky’s Requirements, then Hello World is a good alternative.
Build the Blinky with west build, changing
<your-board-name> appropriately for your board:
cd ~/zephyrproject/zephyr
west build -p auto -b <your-board-name> samples/basic/blinky
cd ~/zephyrproject/zephyr
west build -p auto -b <your-board-name> samples/basic/blinky
cd %HOMEPATH%\zephyrproject\zephyr
west build -p auto -b <your-board-name> samples\basic\blinky
The -p auto option automatically cleans byproducts from a previous build
if necessary, which is useful if you try building another sample.
Flash the Sample
Connect your board, usually via USB, and turn it on if there’s a power switch. If in doubt about what to do, check your board’s page in Supported Boards.
Then flash the sample using west flash:
west flash
You may need to install additional host tools
required by your board. The west flash command will print an error if any
required dependencies are missing.
If you’re using blinky, the LED will start to blink as shown in this figure:
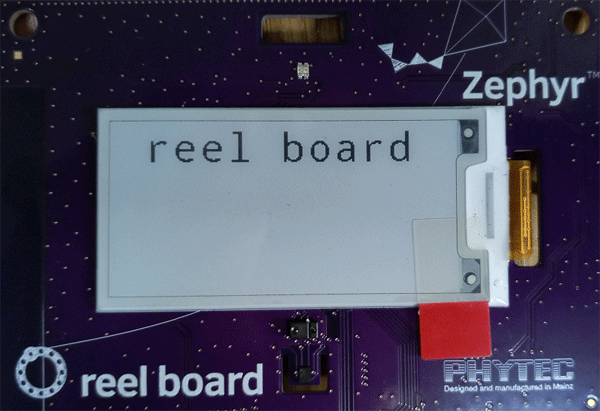
Fig. 1 Phytec reel_board running blinky
Next Steps
Here are some next steps for exploring Zephyr:
Try other Samples and Demos
Learn about Application Development and the west tool
Find out about west’s flashing and debugging features, or more about Flashing and Hardware Debugging in general
Check out Beyond the Getting Started Guide for additional setup alternatives and ideas
Discover Resources for getting help from the Zephyr community
Asking for Help
You can ask for help on a mailing list or on Discord. Please send bug reports and feature requests to GitHub.
Mailing Lists: users@lists.zephyrproject.org is usually the right list to ask for help. Search archives and sign up here.
Discord: You can join with this Discord invite.
GitHub: Use GitHub issues for bugs and feature requests.
How to Ask
Important
Please search this documentation and the mailing list archives first. Your question may have an answer there.
Don’t just say “this isn’t working” or ask “is this working?”. Include as much detail as you can about:
What you want to do
What you tried (commands you typed, etc.)
What happened (output of each command, etc.)
Use Copy/Paste
Please copy/paste text instead of taking a picture or a screenshot of it. Text includes source code, terminal commands, and their output.
Doing this makes it easier for people to help you, and also helps other users search the archives.
When copy/pasting more than 5 lines of text into Discord, create a snippet using three backticks to delimit the snippet.